
When you get a task that will require a merge request to the main branch because you change some code for example there’s a certain order or way to do things.
Firstly if there isn’t a existing issue on GitLab you create one and prepare a merge request, so let’s look at how we do that.
Another thing to watch out for if you get an issue in which you need to remove some code part and some of that is inside the config.ini or .env file you don’t do that yourself since it would only be so locally. Instead you write it in your merge request and / or issue that on this and this line of the file, and then what to remove in the comment of the merge request / issue.
Create an Issue
To cerate an issue you login to GitLab and go into the project you wish to make the issue (myhosttech or wonderland) usually. Then in the nav on the left side click on “Issues” then you get to page with all the issues from that project. Click “New issue” the blue button on the top right.

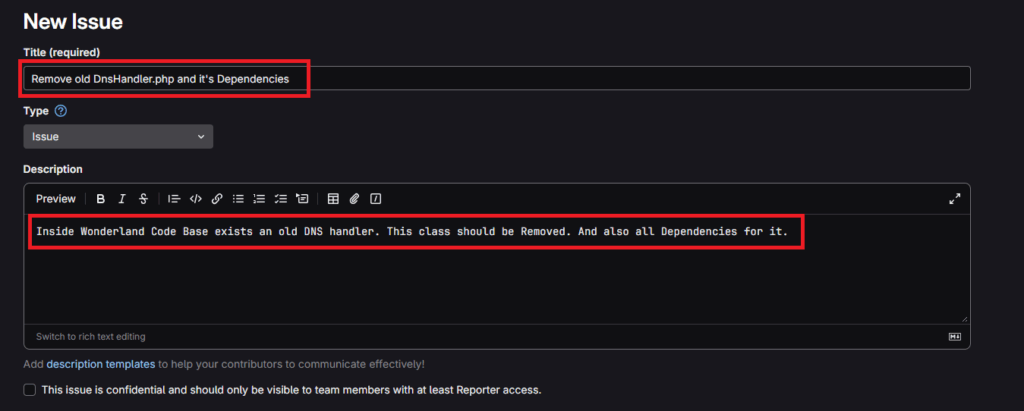
Now you get to a menu where you create the issue. Someone can understand what you’re doing or what had been done just by the title and the description, so it’s important that you choose a good and fitting title and description. Depending you can lean towards the title of the task which you received same as the description. But you need to adjust it a bit. Here’s how the task for me was written:
Title:
Remove library/Wonderland/Handler/DNS/DnsHandler.php and it’s dependencies
Description:
Inside Wonderland Code Base exists an old DNS handler. This class should be Removed. And also all Dependencies for it.
As you can see I took it as a basis but adjusted it a bit and removed the unnecessary parts. Well I kept the description the same but it’s not a given.
Usually you will always assign to yourself so just click the “assign to myself” text next to the box (not visible anymore since i already clicked it but you’ll notice it) or search for yourself. Then you also add the label “Doing” since normally you start working at the task right after. As for the rest it’s rarely used (Weight, Due date, Iteration). The Epic and Milestone one’s are only in special cases where you’re working at a big or predefined project, this will most likely be made of knowledge beforehand, worst case just quickly ask.
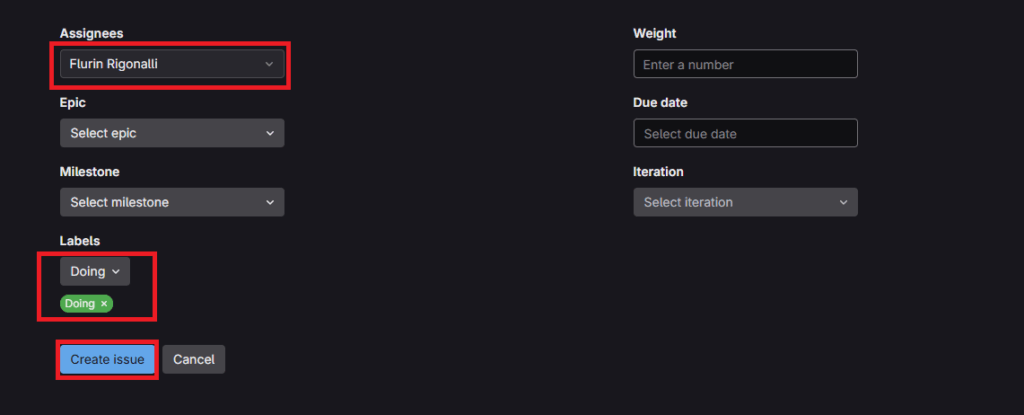
Once you’re done with all that you can click “Create issue” once you’ve done that you should get transferred to the page with your issue if not you can find all your issues here at the top right menu:
Create a Merge Request
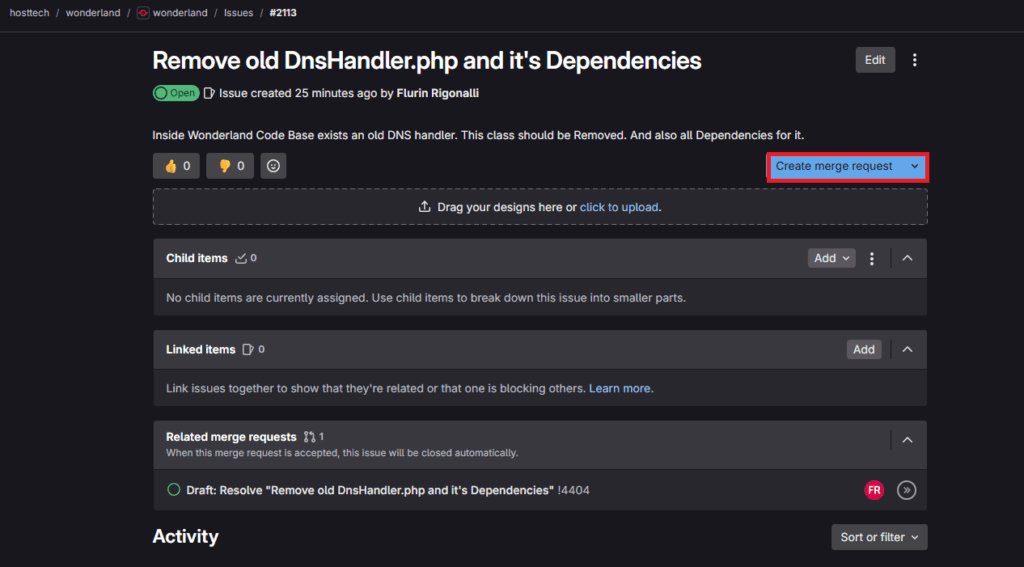
After you created your issue you can create a merge request for that issue, for that you click “Create merge request”.
Now you get to a page where you can create your merge request. There’s a pre-set title (title of the issue) and description (branch number), usually you can just keep those as is. Then again assign the branch to yourself but this time you also need to assign a reviewer which generally or always will be Simon Bass.
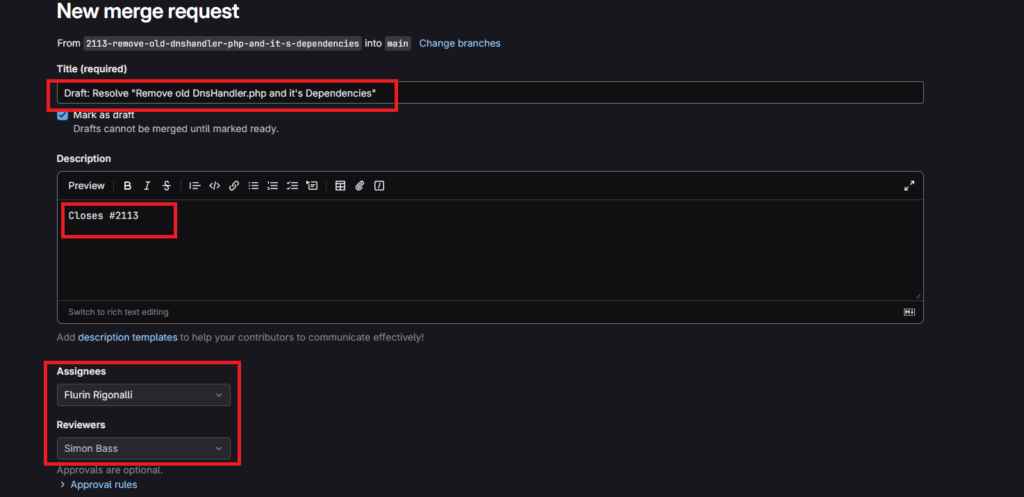
The label is to be the same as the issue since those are “hand in hand” as or the milestone you only need to set it if you also did so in the issue. The dependencies you can ignore for now (since i don’t know exactly when, why or for what) they are used for. The rest you can leave at default (Merge can start and the Merge options). The checkboxes Simon will usually adjust himself anyhow.
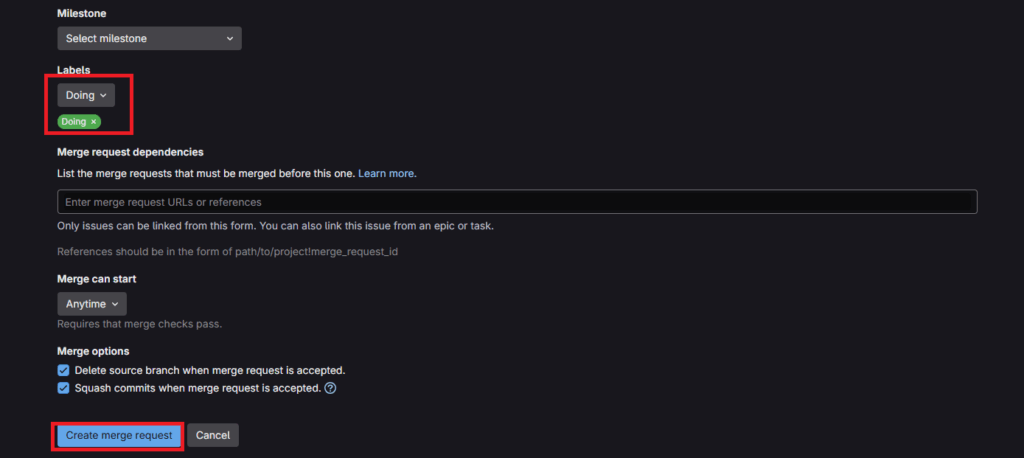
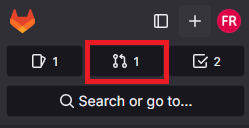
Once you’re done with all that you can click “Create merge request” once you’ve done that you should get transferred to the page with your merge request if not you can find all your merge requests here at the top right menu:
Select you Branch in PHPStorm
After you done the steps above you can almost start working at the task at hand just one last thing you need to do. That is to select the correct branch which you prepared. Click on the “main branch” and then the small arrow pointing south-west. This fetches all the remote branches that exist.
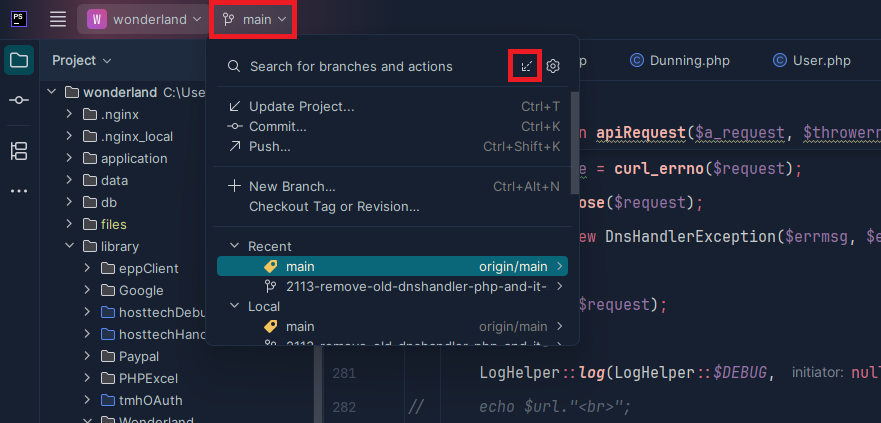
After you fetched all the branches you click the “main” or whichever branch your on and scroll down to “Remote” then open the folder and look for the branch you created. You can find that number in the issue you created or it’s the same number from the merge request description. Then you click on that branch and select “Checkout”, this will move you to the selected branch.
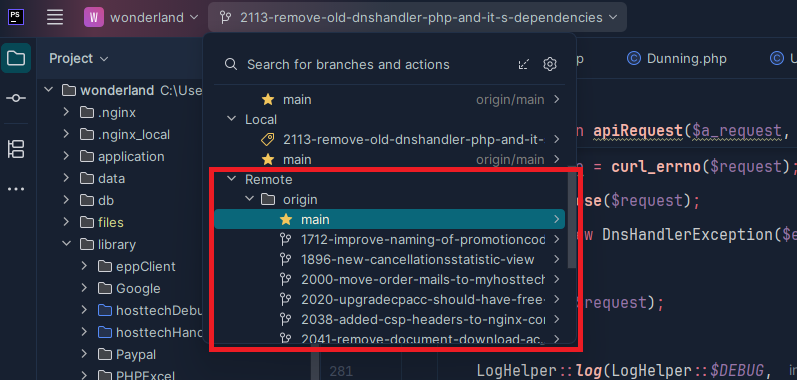
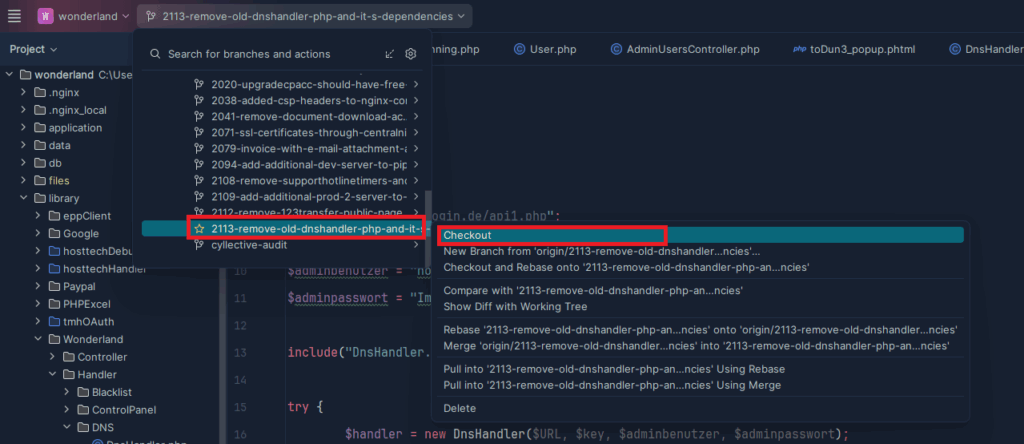
Now you should be on the selected branch, to check just look at the top to see if it’s still “main” or whichever branch you were on before. Now any commits you do will go to this branch.
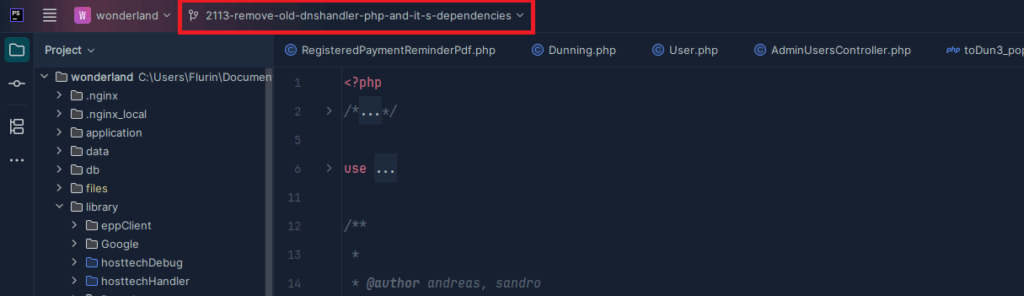
Now after you’ve done all the steps above and everything work and looks as it’s supposed to you can finally start working.
Commit on the Branch
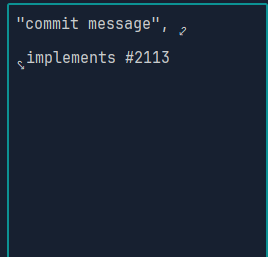
Now the commits work the same as normal but an extra rule you need to do is at the end of your commit message add a “, implements #(branch number)” in this example it would be “, implements #2113”. Replace the “commit message” with your own commit message.
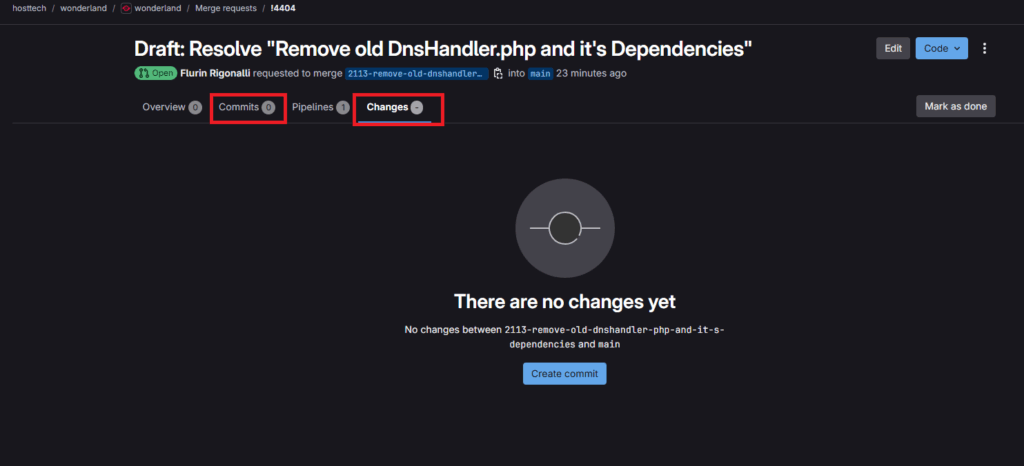
Now the chances you did in the code base and the commits you can find in Gitlab in your merge request under “Changes” or “Commits”. This makes it easy for people to see, for example Simon.
Before setting an issue to “To Review”
Before setting your branch or issue in myhosttech to “To Review”, make sure the following points have been checked:
- Make sure the pipeline passes successfully
Only set an issue to “To Review” once all checks in the pipeline have passed successfully. You should see a green checkmark indicating that the pipeline is complete and no checks are failing. - Check the Definition of Done (DoD)
Before moving the issue to “To Review”, look over your changes once more and make sure they meet all requirements defined in the Definition of Done (DoD).The current Definition of Done can be found in BookStack or in the email that was sent after the Dev Days. - Make sure the tests cover your changes
Tests are a requirement in myhosttech. Whenever you add new functionality or adjust existing code, check whether the existing tests still cover the changed behaviour.If necessary, update the existing tests or add new tests for the functionality you introduced or changed.
Tests in general
Tests are an important part of development in myhosttech and should be considered whenever code is changed.
When adding something new or modifying existing functionality, always check the related tests. Depending on the change, this may mean adjusting existing tests, adding additional test cases, or creating new tests entirely.
You can run tests locally in two ways:
Using PhpStorm:
Open the relevant test file and click the Run button (green triangle). Depending on your PhpStorm layout, this can be found at the bottom-left or top-right of the editor.
Using the command line:
You can run a specific test file with:
php artisan test path/to/file // the file name itself also of course so should end with TestFileName.php, usually at leastRunning the relevant tests locally before pushing your changes can help catch problems early. The pipeline is still to be used as the final confirmation that all automated checks pass before the issue is moved to “To Review”.